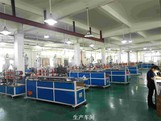
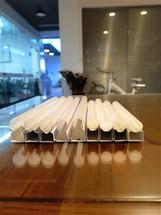
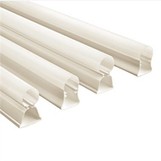
Hey there! As a supplier of Tri Proof Lamp Covers, I've seen my fair share of questions about how to adjust their position. It might seem like a small thing, but getting the cover in the right spot can make a huge difference in how well your Plastic Tri Proof Light works and how it looks. So, let's dive into it!
Why Adjusting the Position Matters
First off, you might be wondering why you even need to adjust the position of a Tri Proof Lamp Cover. Well, for starters, proper positioning ensures that the light is distributed evenly. If the cover is off - center or tilted, you could end up with dark spots or uneven illumination in the area where the light is installed.
Secondly, a well - positioned cover provides better protection. Tri Proof Fixture Covers are designed to shield the lamp from dust, water, and other environmental factors. If the cover isn't sitting right, these elements can seep in and damage the lamp over time.
Tools You'll Need
Before you start adjusting the cover, it's a good idea to gather the necessary tools. You won't need anything too fancy. A simple screwdriver (either flat - head or Phillips, depending on the type of screws used in your cover) is usually all you need. Sometimes, if your cover has clips or latches, you might need a small pair of pliers to help you release or adjust them.
Step - by - Step Guide to Adjusting the Position
Step 1: Safety First
Before you touch anything, make sure the power to the lamp is turned off. This is crucial to avoid any risk of electric shock. You don't want to end up in the hospital just because you forgot to flip the switch!
Step 2: Inspect the Cover
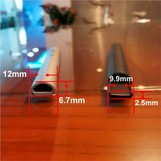
Take a good look at the cover. Check for any signs of damage, like cracks or broken clips. If you notice any issues, it might be a good idea to replace the cover instead of just adjusting it. Also, look at how the cover is currently attached. Is it screwed on, clipped, or latched? This will determine how you'll go about making the adjustments.
Step 3: Loosen the Fasteners
If your cover is held in place by screws, use your screwdriver to loosen them. Don't take them out completely, just enough so that the cover can be moved around a bit. If it's clipped or latched, use your pliers or your fingers to release the clips or latches gently.
Step 4: Reposition the Cover
Once the cover is loose, you can start moving it into the correct position. You might need to align it with the lamp housing or the mounting brackets. Make sure it's centered and sitting flush against the lamp. You can use your eyes to judge the alignment, but if you want to be more precise, you can use a level to ensure that the cover is straight.
Step 5: Tighten the Fasteners
After you're satisfied with the position of the cover, it's time to secure it again. If you loosened screws, tighten them back up. Make sure not to overtighten, as this could crack the cover or damage the lamp housing. If it's a clip - on or latch - on cover, re - engage the clips or latches firmly.


Step 6: Test the Lamp
Once the cover is back in place and secured, turn the power back on and check the lamp. Look for any areas of uneven light distribution or signs that the cover isn't sitting right. If everything looks good, then you're all set!
Common Issues and How to Fix Them
The Cover Won't Stay in Place
If you're having trouble getting the cover to stay in position, it could be because the fasteners are worn out. In this case, you might need to replace the screws, clips, or latches. You can usually find replacement parts at your local hardware store.
Uneven Light Distribution
Even after adjusting the cover, you might still notice uneven light. This could be due to a problem with the lamp itself. Check the bulbs to make sure they're all working properly and are the correct wattage. Sometimes, a dirty or scratched cover can also cause uneven light, so you might want to clean or replace it.
Difficulty Removing the Cover
If you're having a hard time removing the cover to make adjustments, it could be because the screws are rusted or the clips are stuck. Try using a little bit of lubricant, like WD - 40, on the screws or clips. Let it sit for a few minutes to loosen things up, and then try again.
Maintenance Tips
Once you've adjusted the cover and everything is working well, it's important to keep up with regular maintenance. Clean the cover every few months to remove any dirt or grime that might have built up. You can use a mild soap and water solution and a soft cloth to wipe it down.
Also, check the cover periodically to make sure it's still in the right position. Over time, vibrations or other factors can cause the cover to shift slightly. By catching these issues early, you can prevent more serious problems from developing.
Conclusion
Adjusting the position of a Tri Proof Lamp Cover isn't rocket science, but it does require a little bit of care and attention. By following the steps outlined above, you can ensure that your Plastic Waterproof Light is protected and providing optimal illumination.
If you have any questions or need more help with your Tri Proof Lamp Covers, don't hesitate to reach out. We're here to assist you with all your lighting needs. Whether you're looking for a new cover or just need some advice on installation and adjustment, we've got you covered.
If you're interested in purchasing high - quality Tri Proof Lamp Covers, feel free to get in touch for a quote. We offer a wide range of covers to suit different types of lamps and applications. Let's work together to keep your spaces well - lit and protected!
References
- General knowledge from years of experience as a Tri Proof Lamp Cover supplier.
- Industry best practices for lamp maintenance and adjustment.