Installing an LED diffuser strip on a curved surface can be a challenging yet rewarding task. As a leading supplier of LED Diffuser Strips, I've witnessed firsthand the transformative power of these products in enhancing lighting aesthetics and functionality. In this blog post, I'll share a comprehensive guide on how to install an LED diffuser strip on a curved surface, ensuring a seamless and professional finish.
Understanding LED Diffuser Strips
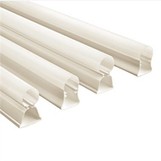
Before diving into the installation process, it's essential to understand what LED diffuser strips are and why they're a popular choice for lighting applications. LED diffuser strips are designed to soften and spread the light emitted by LEDs, reducing glare and creating a more uniform illumination. They come in various shapes, sizes, and materials, including Lampshade PC Diffuser, Extruded Linear Lens, and LED Light Lens, each offering unique benefits and characteristics.
Tools and Materials You'll Need
- LED Diffuser Strip: Choose a diffuser strip that is flexible enough to conform to the curvature of your surface. Consider the length, width, and diffusion properties based on your specific lighting requirements.
- LED Strip Lights: Select high-quality LED strip lights that are compatible with your diffuser strip. Ensure that the strip lights have the appropriate brightness and color temperature for your application.
- Measuring Tape: Accurately measure the length and curvature of the surface where you'll be installing the diffuser strip.
- Scissors or Utility Knife: Use these tools to cut the diffuser strip and LED strip lights to the desired length.
- Adhesive Tape or Mounting Clips: Secure the diffuser strip and LED strip lights to the surface. Adhesive tape is suitable for smooth surfaces, while mounting clips are ideal for uneven or textured surfaces.
- Heat Gun or Hairdryer: Apply heat to the diffuser strip to make it more flexible and easier to bend around the curve.
- Safety Gear: Wear safety glasses and gloves to protect yourself during the installation process.
Step-by-Step Installation Guide
Step 1: Prepare the Surface
- Clean the surface where you'll be installing the diffuser strip to remove any dust, dirt, or debris. This will ensure proper adhesion and a clean finish.
- Measure the length and curvature of the surface using a measuring tape. Mark the starting and ending points of the installation area.
Step 2: Cut the Diffuser Strip
- Using scissors or a utility knife, cut the diffuser strip to the desired length. Leave a small margin for adjustment.
- If the diffuser strip has a protective film, leave it on until the final installation to prevent scratches.
Step 3: Prepare the LED Strip Lights
- Cut the LED strip lights to the same length as the diffuser strip. Make sure to cut the strip lights at the designated cutting points to avoid damaging the LEDs.
- Connect the LED strip lights to a power source, following the manufacturer's instructions. Test the lights to ensure they are working properly.
Step 4: Apply Heat to the Diffuser Strip
- Use a heat gun or hairdryer to apply heat evenly to the diffuser strip. Move the heat source back and forth along the length of the strip, keeping it at a safe distance to avoid overheating or melting the plastic.
- As the diffuser strip heats up, it will become more flexible and easier to bend around the curve. Apply gentle pressure to shape the strip to the curvature of the surface.
Step 5: Secure the Diffuser Strip
- Once the diffuser strip is bent to the desired shape, use adhesive tape or mounting clips to secure it to the surface. Start at one end of the strip and work your way to the other, ensuring a tight and secure fit.
- If using adhesive tape, remove the protective backing and press the tape firmly onto the surface. Smooth out any air bubbles or wrinkles as you go.
Step 6: Install the LED Strip Lights
- Carefully place the LED strip lights inside the diffuser strip, aligning them with the center of the strip. Make sure the lights are evenly spaced and that the connectors are properly seated.
- Use adhesive tape or mounting clips to secure the LED strip lights to the diffuser strip. This will prevent the lights from shifting or moving during use.
Step 7: Connect the Power Supply
- Connect the LED strip lights to a power supply, following the manufacturer's instructions. Make sure the power supply is compatible with the voltage and current requirements of the LED strip lights.
- Test the lights again to ensure they are working properly. If any issues arise, double-check the connections and troubleshoot as necessary.
Step 8: Finalize the Installation
- Once the diffuser strip and LED strip lights are installed and working properly, trim any excess material from the ends of the strip.
- Remove the protective film from the diffuser strip to reveal a clean and polished finish.
Tips and Tricks
- Take Your Time: Installing an LED diffuser strip on a curved surface requires patience and precision. Take your time to measure, cut, and shape the strip accurately to ensure a professional-looking finish.
- Test the Bending Radius: Before cutting the diffuser strip to length, test the bending radius on a small piece of the strip. This will help you determine the maximum curvature that the strip can handle without cracking or breaking.
- Use a Template: If you're working with a complex curve, create a template out of cardboard or paper to help you shape the diffuser strip. This will ensure a consistent and accurate fit.
- Seek Professional Help: If you're unsure about any aspect of the installation process, or if you're working with a large or complex project, consider seeking professional help. A qualified electrician or lighting installer can ensure a safe and successful installation.
Conclusion
Installing an LED diffuser strip on a curved surface is a challenging but achievable task that can significantly enhance the look and functionality of your lighting system. By following the steps outlined in this guide and using the right tools and materials, you can create a beautiful and professional-looking installation that will provide years of reliable service.
As a trusted supplier of LED Diffuser Strips, we offer a wide range of high-quality products to meet your specific lighting needs. Whether you're looking for a Lampshade PC Diffuser, Extruded Linear Lens, or LED Light Lens, we have the expertise and resources to help you find the perfect solution.


If you're interested in learning more about our LED Diffuser Strips or have any questions about the installation process, please don't hesitate to contact us. We're here to assist you with your lighting project and help you achieve the best possible results.
References
- Manufacturer's instructions for LED diffuser strips and LED strip lights.
- Lighting industry standards and best practices.