Hey there! As a supplier of LED Diffuser Strips, I've seen firsthand how these nifty little things can transform the look of any space. Today, I'm gonna walk you through the process of installing an LED diffuser strip under your cabinets. It's not as hard as it might seem, and by the end of this post, you'll be well on your way to adding some awesome ambient lighting to your kitchen or wherever you choose to put 'em.
What You'll Need
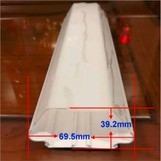
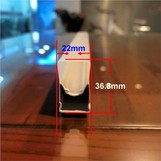
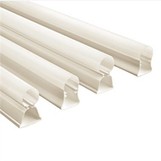
Before we get started, let's talk about the tools and materials you'll need. First off, you're gonna need the LED Diffuser Strip itself. Make sure you pick the right length for your cabinets. You can usually find these in various lengths at your local hardware store or order them online.
Next, you'll need an LED light strip. You can get these in different colors and brightness levels, so choose one that suits your style and needs. Some LED light strips come with adhesive backing, which makes installation a breeze.
You'll also need a power supply. This is what's gonna give your LED lights the juice they need to shine. Make sure the power supply is compatible with your LED light strip.
Other tools you'll need include a measuring tape, a utility knife, a screwdriver (if your cabinets require it), and some mounting brackets or clips. These will help you secure the LED diffuser strip and the light strip in place.
Step 1: Measure and Plan
The first step is to measure the length of the area under your cabinets where you want to install the LED diffuser strip. Use your measuring tape to get an accurate measurement. It's a good idea to add a few extra inches to your measurement just to be on the safe side.
Once you have your measurement, mark the area where you'll be installing the strip. You can use a pencil or a piece of masking tape to do this. This will help you keep everything straight and aligned when you start installing.
Step 2: Prepare the LED Diffuser Strip
Now it's time to prepare the LED Diffuser Strip. If it's longer than the area you measured, use your utility knife to cut it to the right length. Make sure you cut it straight and clean.


Some LED diffuser strips come with end caps. If yours does, attach the end caps to the ends of the strip. This will give it a finished look and help protect the LED light strip inside.
Step 3: Install the Mounting Brackets or Clips
If your cabinets don't have a flat surface for the LED diffuser strip to stick to, you'll need to install some mounting brackets or clips. Use your screwdriver to attach the brackets or clips to the underside of the cabinets. Make sure they're evenly spaced and level.
Step 4: Attach the LED Light Strip
Now it's time to attach the LED light strip to the LED diffuser strip. If your LED light strip has adhesive backing, simply peel off the backing and stick it to the inside of the diffuser strip. Make sure it's centered and straight.
If your LED light strip doesn't have adhesive backing, you can use some double-sided tape or mounting clips to attach it. Just make sure it's securely attached so it doesn't come loose.
Step 5: Connect the Power Supply
Once the LED light strip is attached to the diffuser strip, it's time to connect the power supply. Follow the instructions that came with your power supply to make the connection. Make sure the power is turned off before you make any connections to avoid getting shocked.
Step 6: Install the LED Diffuser Strip
Now that everything is connected, it's time to install the LED diffuser strip under your cabinets. If you installed mounting brackets or clips, slide the diffuser strip into the brackets or clips. If you're using adhesive, simply peel off the backing and stick the diffuser strip to the underside of the cabinets.
Make sure the diffuser strip is level and straight. You can use a level to help you with this. Once it's in place, press down firmly to make sure it's securely attached.
Step 7: Test the Lights
Finally, it's time to test the lights. Turn on the power supply and see if the LED lights come on. If they don't, check your connections to make sure everything is properly connected. If you're still having problems, you may need to consult the instructions that came with your LED light strip or power supply.
Tips and Tricks
- If you're installing the LED diffuser strip in a kitchen, make sure it's away from any sources of heat or moisture. This can damage the LED lights and the diffuser strip.
- You can use different colors of LED light strips to create different moods. For example, warm white lights can create a cozy atmosphere, while cool white lights can make a space look brighter and more modern.
- If you want to add some extra style to your cabinets, you can use a Lampshade PC Diffuser or an Extruded Linear Lens to diffuse the light even more.
Conclusion
Installing an LED diffuser strip under your cabinets is a great way to add some ambient lighting to your space. It's a relatively easy DIY project that can make a big difference in the look and feel of your kitchen or any other room.
If you're interested in purchasing LED diffuser strips, Lampshade PC Diffusers, or Extruded Linear Lenses, feel free to reach out to us. We're here to help you find the right products for your needs and answer any questions you may have. Let's start a conversation about your lighting project and see how we can make it shine!
References
- General knowledge and experience from working as an LED Diffuser Strip supplier.
- Product manuals and instructions for LED light strips, power supplies, and related products.